
Hi guys, I know quite a few of you were looking forward to this tutorial but today has been really busy and I'm really tired.
Anywho this is a really simple tutorial but it creates a great result.
What you will need:

Base Coat
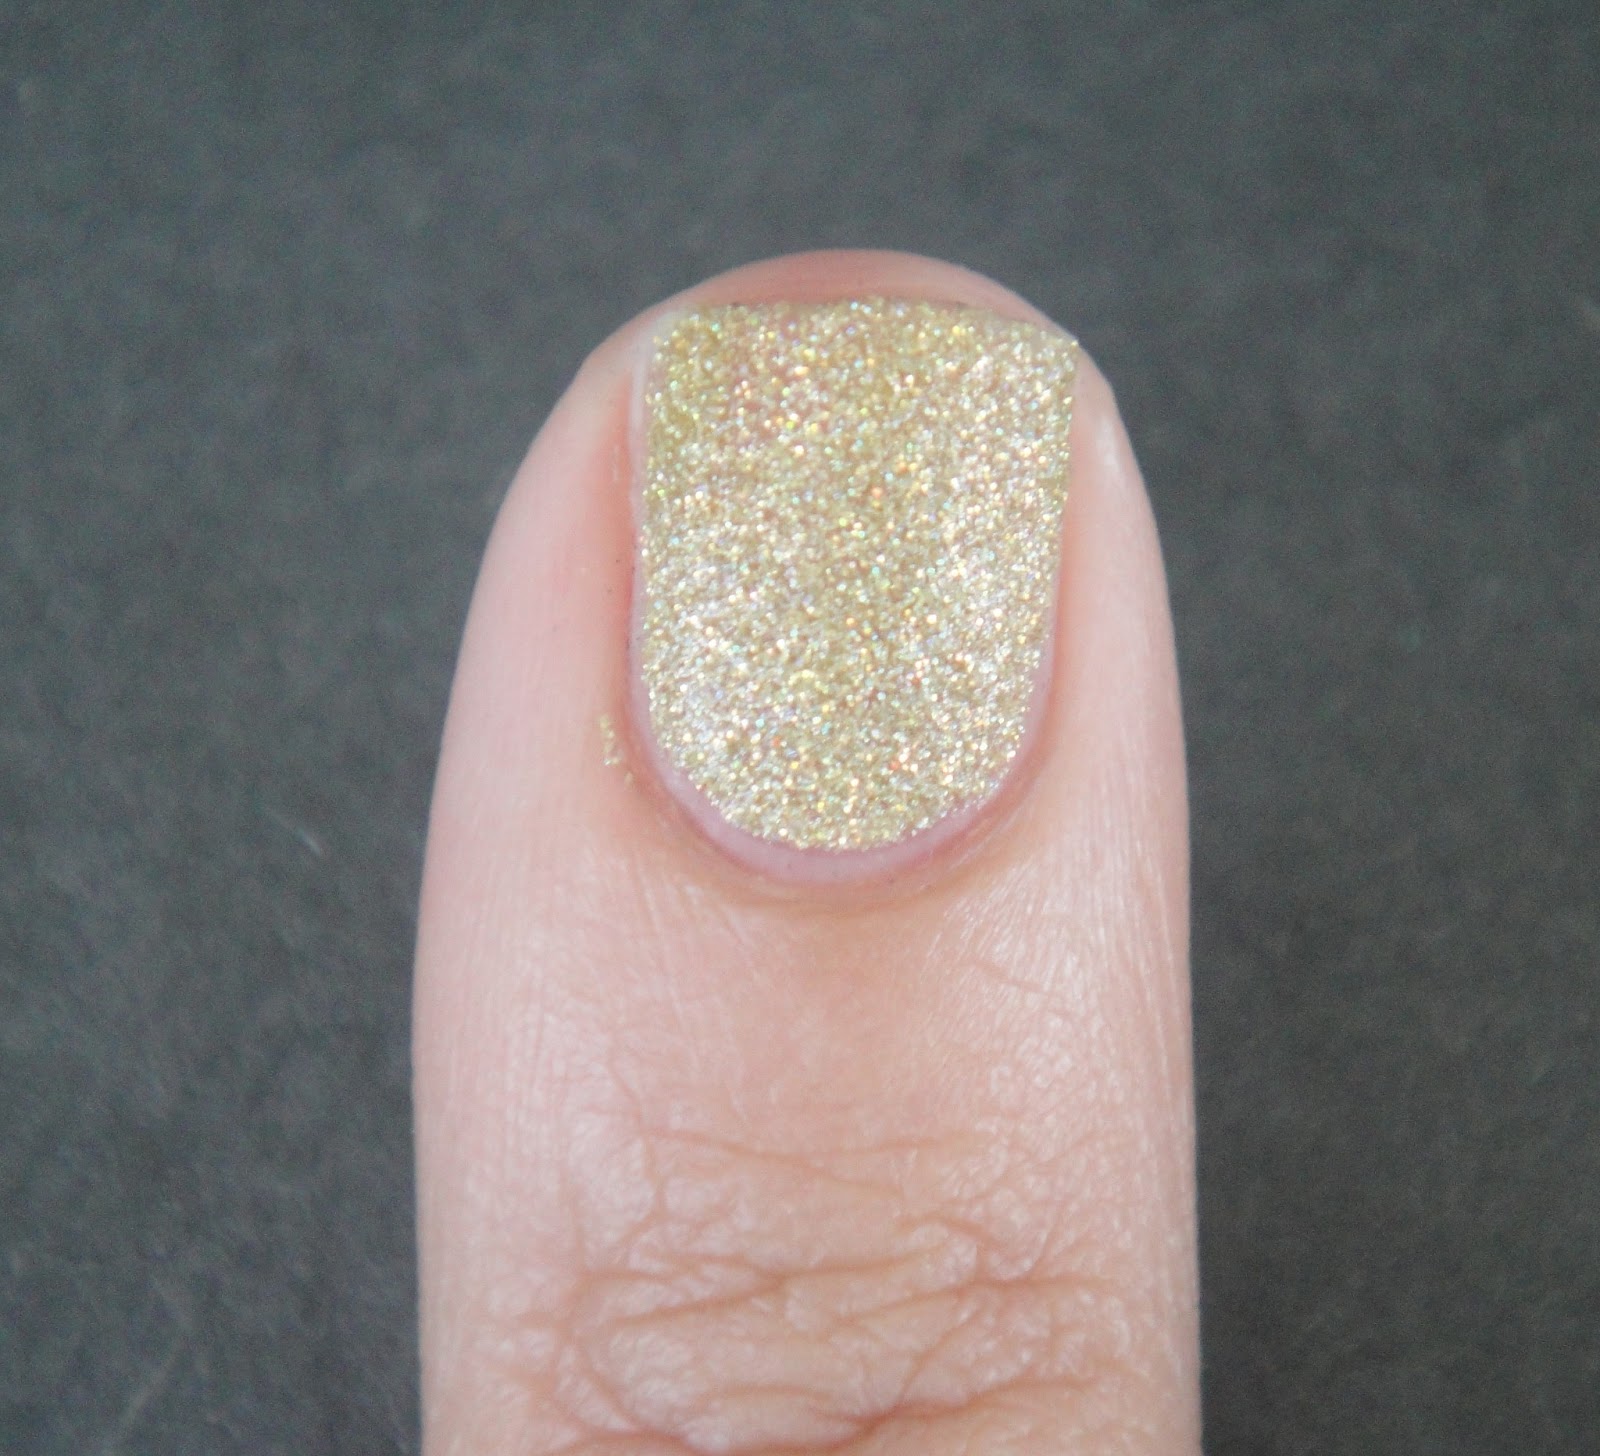
A fine, gritty, topcoat hungry glitter. I'm using China Glaze Angel Wings
Acrylic paint of your choice. It should be pigmented and quite thin, (if yours is thick then thin it down with some water)
A brush to paint on your acrylic paint, it needs to cover the whole nail so you don't want one which is too fine.
STEP 1 - Apply your gritty glitter and allow it to fully dry.
STEP 2 - Using your brush paint cover the glitter with one thin coat of acrylic paint

Do not topcoat! This will lessen the textured effect.
So this mani probably isn't the best in terms of longevity, as acrylic paint can wear away quite easily without topcoat.
If you have a thin, watery topcoat then you can apply that because it won't make a big difference to the overall effect.
That's all folks, do give this a try and let me know how you got on
Tweet Pin It
The textured nail trend isn't my thing, but this is a perfectly logical tutorial - good thinking!
ReplyDelete