Showing posts with label tutorial. Show all posts

Sunday, 12 October 2014

LAVENDER NAIL ART & TUTORIAL

Hey guys, is it Sunday night again? The weekend goes way too quick! 
I often get questions about the acrylic paint I use in my nail art and normally I just pick up them in random places so I haven't been able to recommend any brands or places to purchase until now. 
I did quite a bit of research online for some acrylic paints which weren't the regular red, blue, green, yellow, white and black etc. but also affordable and I'm happy to report I found the perfect paint! 
So the acrylic paint I found is by DecoArt and is sold by Art Discount for a very reasonable £1.30 for 59 ml and the colour range is huge, like seriously, there is every colour imaginable! You can find them here. All the paints I've tried so far have great opacity and formula so there's no need to thin them down. 
I received a lovely selection of these paints quite a while ago to share with you and I'm really sorry this took so long to make it to the blog but there are lots of posts coming up using these acrylic paints and also some tutorials as well. 
So let's get onto tonights nails. This design was inspired by the paint in the shade Lavender* and I also paired it with the shade Leaf Green*. 
I used a base colour of Barry M Gelly in Huckleberry. 
Click read more to see the rest of the pictures and of course the tutorial and it's a very simple one :)

Pin It

Sunday, 21 September 2014

GREEN GRADIENT CHEVRON NAILS & TUTORIAL

Hi everyone, I hope you've all had a lovely weekend! I haven't really done anything, just getting stuff ready and organised for uni, but the weekend has gone way too fast! 
So today I have some gradient effect chevron nails to show you, I love how these look and they are so simple to do as well so I've added a tutorial in this post, if you want to see how I did these just click the 'read more' button below all the pictures :) 


Pin It

Saturday, 13 September 2014

SUNSHINE NAILS - UK EDITION

Hi everyone, I hope your all having a lovely weekend! Today I went and picked up my very first car and I love it, then I went to my little cousins birthday party!
Today I have a fun mani to show you which to me is a true representation of the British weather.
We very rarely have a sunny day with blue skies, mostly the sun plays hide and seek with the clouds and more often than not it rains.
I have included a tutorial for you after the jump so click read more if you want to recreate these nails.  


Pin It

Saturday, 23 August 2014

RAINBOW CHEVRON NAIL VINYL TUTORIAL

Happy Saturday, how are you all?
Today I have another tutorial for you :) This is for the rainbow chevron nail art I posted yesterday. It's really easy to do but you just need a little bit of patience, so let's get cracking !
It's a little difficult to explain so I'd recommend looking at the pictures as they help explain the whole process.  

What you will need:
Base Coat
7 different coloured nail polishes (one's missing from the picture) I'm using the entire OPI Neon collection and Morgan Taylor Making Waves
Chevron Nail Vinyls, I'm using these from She Sells Seashells 
Tweezers 
Quick dry top coat (or regular top coat and a fair bit of patience) 

STEP 1 - Starting at the cuticle, paint 1/3 of your nail with the colour you want to be second in your overall design. (For a rainbow I'm doing orange first) It doesn't have to be neat 

STEP 2 - Paint the middle 2/3 of the nail with the colour you want to be 4th in your overall design. 
Paint the remaining top 1/3 of your nail with the colour you want to be 6th in your overall design. 
Then apply fast dry top coat

STEP 3 - Once it's all properly dry apply one chevron vinyl on top of each different colour like so

STEP 4 - Use your first and 3rd colour and paint either side of the vinyl.  

STEP 5 - Immediately remove the first vinyl to get a clean edge and the paint the other side of the 2nd vinyl like so  

STEP 6 - Immediately remove the 2nd nail vinyl and paint the other side of the final nail vinyl.  

STEP 7 - Immediately remove the final vinyl, wait a few minutes for the polish to dry and apply topcoat and you are done! 


Let me know if you try this out, feel free to email me a link or tweet me or share on instagram :) 


Pin It

Friday, 1 August 2014

INTERLOCKING DOTS NAIL ART TUTORIAL

Hey guys, I posted a couple of Interlocking dot nail art a while ago and I got a few requests for a tutorial. So that's what I have for you today! 

If you want to see how to do these nails just read on :)


What you will need: 

Base Coat
2 (or more) different nail polishes. I'm using Illamasqua Noble and Jo'mina 
Dotting Tool*
Top Coat

STEP 1 - After base coat, paint half of the nail diagonally with your first colour. It doesn't have to be perfect.

STEP 2- Paint the other half of the nail with your other colour. 

STEP 3 - Using your dotting tool, make dots along the middle line, where the colours meet, making sure you leave a similar sized gap between each dot. 

STEP 4 - Again using the dotting tool and the 2nd colour and create dots in the gaps you made before

STEP 5 - Add a layer of top coat. 

And that is it, yep it's really simple and easy to do, so do give it a try and share them with me! 
Enjoy your weekend :) 

Pin It

Monday, 26 May 2014

HOW TO CREATE A STAMPING DECAL

Hey guys, how are you all? I'm sorry it's been nearly a week since I last posted but this week has been busy! We've had my adopted granddad staying with us and my little cousin. I've also been looking for jobs for this summer and I also spent a day 'deep cleaning' my bedroom after exams lol! 
Anyway enough about me, let's talk nails. I know nearly everyone has done a tutorial for a stamping decal but I made this a while ago and it seemed like a shame to not post it. So for these nails I went for a multichrome peacock design, which I will show you how to recreate below, just click the 'read more' button. 


Pin It

Monday, 31 March 2014

GEOMETRIC NAILS WITH ILLAMASQUA PARANORMAL & TUTORIAL

Hey guys, how are you all? I have a day off today I feel ill, my throat is red, sore and hurting and I have an earache and a headache, not that I'm complaining ;( 
So here are some nails I forgot to post!
I love geometric nails and was in the mood recently, I decided to use 2 of the polishes from the Illamasqua Paranormal collection, I used Omen and Seance and used black acrylic paint for all the detail. It's really easy to do and I've included a tutorial after the break if you want to recreate this :)


Pin It

Monday, 3 February 2014

STRAW DIPPED NAILS & A TUTORIAL

Hey guys, how are you all?
So the other day when I was climbing into bed I was struck by nailspiration! Using a straw to make circles on the nails, how cool would that be? Anyways the next day I'd forgotten all about it until I sat at my nail desk and saw a straw in my pen pot (don't ask!)
I decided to try it out and well I love it, it's really simple and easy to do and I've created a tutorial to help you. 
For this design I used Illamasqua Load for the base colours and then used Illamasqua Grab, Urban Outfitters  Bandeau and Color Club Chelsea Club. 
Click on the read more to see the tutorial. 


Click on to see the tutorial
Pin It

Tuesday, 21 January 2014

SIMPLE, EASY & QUICK GLEQUIN NAILS & REVIEW, TUTORIAL & DISCOUNT CODE FOR VIVA LA NAILS

Hi guys, long title! If you follow me on instagram you know that I shared a sneaky peak of a gorgeous polish yesterday which I said I'd show you today but I completely forgot that this was still waiting to be posted, so you'll have to wait until tomorrow to see that!
Ok, so I recently got some square glequins and other bits from Viva La Nails to review and here's one of the designs I created with them. I was particularly interested in the square glitter because you guys know I've been on a quest to find the perfect square glitter and their pictures looked promising!
So I receive the blue, pink, red and gold holographic squares, these are on the small size which is why I didn't do a full glitter placement with them because I wanted to create something that was easy and quick for you guys to recreate,  I think they're 1mm.
 I started off with two coats of OPI Sweetheart and then I applied the glequins, I have a tutorial for you later in the post so be sure to click the read more button. 


Click read more to see the tutorial, my review and a discount code for you :)
Pin It

Thursday, 18 July 2013

DIY TEXTURED NAILS TUTORIAL

Hi guys, I know quite a few of you were looking forward to this tutorial but today has been really busy and I'm really tired. 
Anywho this is a really simple tutorial but it creates a great result. 

What you will need:
Base Coat 
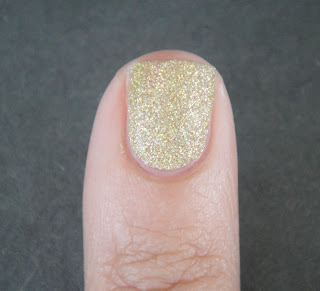
A fine, gritty, topcoat hungry glitter. I'm using China Glaze Angel Wings
Acrylic paint of your choice. It should be pigmented and quite thin, (if yours is thick then thin it down with some water) 
A brush to paint on your acrylic paint, it needs to cover the whole nail so you don't want one which is too fine.


STEP 1 - Apply your gritty glitter and allow it to fully dry. 


STEP 2 - Using your brush paint cover the glitter with one thin coat of acrylic paint 

Do not topcoat! This will lessen the textured effect. 
So this mani probably isn't the best in terms of longevity, as acrylic paint can wear away quite easily without topcoat. 
If you have a thin, watery topcoat then you can apply that because it won't make a big difference to the overall effect. 

That's all folks, do give this a try and let me know how you got on 


Pin It